
Brrrr, it’s cold outside. The perfect time to make a big pot of Ribollita, the iconic Florentine soup that appears on every restaurant menu in Tuscany and beyond each winter. In fact, it’s so popular that the entire Tuscan region has adopted it as its own. Ribollita is the queen of la cucina povera Toscana—Tuscan peasant cooking—and much more than a simple soup. By transforming leftover vegetable soup and 2-day old bread into a culinary masterpiece, ribollita has earned a highly revered place in contemporary Italian cuisine. That says a lot for a dish born out of extreme poverty during ancient times when every scrap of bread and vegetable was thrown into the pot out of sheer desperation for sustenance and nourishment. The result is a dense, flavorful vegetable soup reinforced with white beans and bread—a filling, stick-to-your-ribs dish that’s essentially a thick stew. In fact, the true test of a good ribollita is when a spoon inserted into it stands straight up!

The name ribollita means “reboiled” and comes from the act of cooking a rich vegetable soup then layering it with hardened day-old bread before recooking it again the next day. This way, the bread absorbs any excess broth and puffs up into soft, fluffy clouds of goodness that turn this dish into a more of a porridge or bread pudding than an actual soup. Historically, ribollita was a versatile, homemade miracle pot created by savvy cooks to be consumed over a 3-day period and keep the family fed for multiple meals. The soup was eaten as-is on the first day then allungata or “stretched” with hardened, day-old bread and reboiled on the second day with any remaining ribollita reheated again on the third day. If necessity is the mother of invention, ribollita takes the grand prize for the most ingenious way to repurpose leftover bread and feed a family on a shoestring.

Ribollita is timely now because its star ingredient, lacinato kale, is readily available during fall and winter months. Also known as Tuscan kale or black cabbage, lacinato is an ancient variety of Italian winter greens from the brassica family whose rugged, heavily crinkled leaves of blue-green to almost black color (hence the Italian name cavolo nero) inspired its common name of Dinosaur or Dino kale. By any name, lacinato kale is a true superfood and powerhouse of vitamins (especially A, C, K), minerals, fiber with excellent health benefits. Its peppery flavor is the perfect foil for creamy cannellini beans that are the other key ingredient (beside bread) in this hearty, nourishing dish. Other winter vegetables like cabbage, red onions, carrots, celery, Swiss chard, and potatoes do their part to create a colorful, tasty base to enhance with kale, beans, and bread. The soup gets its luxurious creaminess from white cannellini beans pureed in their cooking water that create the “broth” in this soup. These dried beans are soaked in water overnight then cooked every-so-slowly so the skins don’t toughen. In a pinch, good quality canned or jarred cannellini can be substituted, but do not compare to freshly cooked beans in their garlic and sage infused cooking water that adds incredible taste and consistency to the soup.

The bread traditionally used in ribollita is a Tuscan saltless loaf that’s hard to find outside Tuscany. I use homemade natural leaven sourdough bread, but an artisan rustic Italian loaf like Pugliese or ciabatta will do. It’s worthwhile to plan ahead and slice the bread then let it dry out on a baking sheet for a couple of days in advance, but if that’s not an option then drying it in a moderate oven works fine. Once the vegetable soup is made (it can be done a day or two prior), ribollita comes together quickly and easily. The soup is layered with bread slices in a tall casserole, Dutch oven or pot and let rest before popping into the oven to reheat. While you can “reboil” ribollita in a pot on the stove, I like the soft, souffle-like consistency that baking produces. Once hot and bubbly, ribollita is served heaped into soup bowls and drizzled lavishly with fruity extra virgin olive oil.
As my ribollita cooks, the house is filled with a familiar, homey fragrance that takes me back to winters in Tuscany, sitting in front of the blazing stone fireplace waiting for supper to be ready. Aside from being suddenly famished, I feel a flush of abundance in anticipation of eating a big bowl of delicious, nutritious ribollita that deftly defies its poor peasant origins.
>>Watch me make Ribollita step-by-step on this TV appearance below:
TUSCAN BREAD AND VEGETABLE SOUP
Ribollita
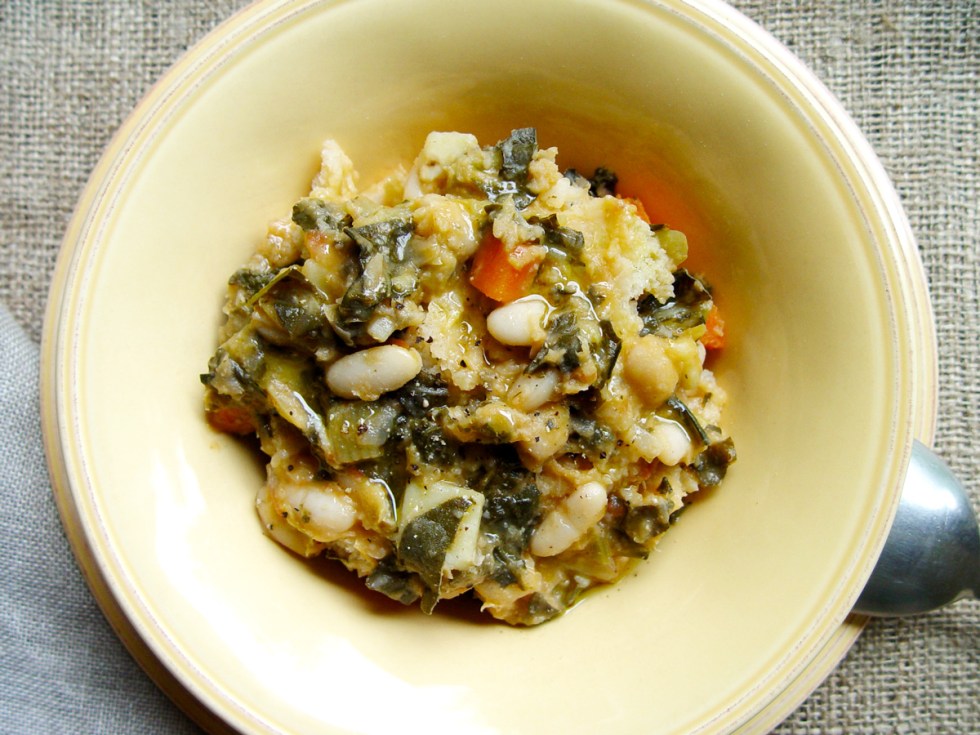
 Ribollita is an icon of Tuscan peasant cooking and a culinary masterpiece that transforms day-old bread and repurposed vegetable soup into a hearty, flavorful, and nourishing dish. © 2019 Deborah Dal Fovo. All rights reserved.
- Prep Time: 30m
- Cook Time: 3h
- Total Time: 3h 30m
- Serves: 8
- Category: First Courses - Primi Piatti, Recipes, Verdure - Vegetables, Zuppa - Soup
Ingredients
- 14 ounces/400g dried cannellini beans, about 2 heaping cups (4 cups canned beans can be substituted)
- 2 garlic cloves, peeled
- 2 sprigs fresh sage
- 2 tablespoons extra virgin olive oil
- ½ cup extra virgin olive oil
- 2 red onions, peeled and chopped into small dice, about 2 cups (yellow onions may be substituted)
- 1 leek (white part only), thinly sliced and rinsed
- 2 carrots, peeled and cut into ½-inch dice
- 2 celery stalks, trimmed and cut into ½-inch dice
- 2 cloves garlic, crushed lightly and peeled
- Few sprigs of fresh thyme
- 4 ripe plum tomatoes, peeled, seeded and chopped (canned plum tomatoes can be substituted)
- 1 pound/455g lacinato kale (Tuscan black kale/dinosaur kale), washed, stemmed, and leaves cut into ½-inch strips (about 8 cups)
- ½ pound/225g Savoy cabbage, washed and shredded into ¼-inch strips (about 4 cups)
- 1 bunch Swiss chard weighing about ½ pound, washed, stemmed, and leaves only cut into ½-inch strips (about 4 cups)
- 2 Yukon gold potatoes, peeled and cut into dice
- One pound/453g Tuscan or rustic bread, cut into ½-inch thick slices and air dried for 2 days until hard (fresh bread slices can be toasted in 350°F/180°C oven)
- ¼ red onion, finely sliced or chopped to garnish
- Good quality Tuscan extra virgin olive oil to garnish
- Kosher or sea salt
- Freshly ground black pepper
Instructions
- Sort through the dried beans and discard any small stones. Place the beans in a large bowl and cover with twice the volume of cold water. Let soak for 12 hours or overnight.
- Drain the beans then place them in a heavy pot (preferably made of glazed earthenware) with 2½ quarts/2½ liters cold water, 2 garlic cloves, sage and 2 tablespoons olive oil. Place over medium heat, covered, and bring to a simmer, occasionally skimming off any foam that forms on the surface. Reduce heat to low and cook, with lid slightly askew, at a slow simmer for about 50 minutes or until beans are tender. Add 2 teaspoons salt and cook for another 10 minutes until beans are soft but not mushy. Scoop half the beans out of the pot using a slotted spoon and reserve. Remove the garlic and sage then puree the remaining beans and their cooking liquid through a food mill or using an emersion blender or food processor. If using canned beans, reserve 2 cups whole beans and heat the remaining beans with packing liquid plus 6 cups water until warm. Puree the beans and liquid as directed above then set aside until needed.
- Heat 1/2 cup extra virgin olive oil in a large, heavy bottomed pot. Add the onions and leeks, season lightly with salt, and cook until softened, about 5 minutes. Stir in the carrots and celery and cook for a few more minutes. Add the garlic, thyme, and chopped tomatoes and cook for about 5 minutes. Add the lacinato kale in increments, stirring and cooking until leaves wilt down enough to make room for more. Add the cabbage, chard and potatoes to the pot then season the vegetables generously with salt and pepper, stirring to incorporate. Cook the vegetables for 10 minutes until softened and reduced down in volume, then pour in the pureed beans and their liquid plus enough hot water to cover the vegetables. Bring the soup to a boil then reduce the heat to low and cook at a gentle simmer, partially covered, for about one hour until vegetables are soft, stirring occasionally and adding more water if needed. The soup should be fairly thick with a small amount of liquid. Stir the whole beans into the soup during the last 5 minutes of cooking. Remove soup from heat and let cool until just warm then proceed to the next step or refrigerate to continue recipe the next day.
- In the bottom of a 3-quart dutch oven or high-sided baking/souffle dish (or two 1.5-quart), spread a 1-inch thick layer of vegetable soup. Arrange one-third of the bread slices to fit over the soup then cover the bread with another layer of soup. Repeat the layers ending with a thick layer of soup (about 3 layers of bread). Let stand for a couple of hours or cover and refrigerate overnight.
- The ribollita can now be reheated in one of two ways: in the oven or on the stovetop (I prefer the oven method since it doesn't require attention or stirring). If using the baking method, preheat the oven to 400°F/200°C about one hour before serving time. Drizzle the surface of the ribollita with extra virgin olive oil then sprinkle with sliced red onion and freshly ground black pepper. Bake in center of hot oven for 30 minutes until bubbly and a light crust forms on the surface. Alternately, the soup can be re-boiled (ribollita) over medium-low heat on the stove until heated through.
- Serve large ladlefuls of ribollita in soup bowls with generous pours of fruity extra virgin olive oil swirled over top. Leftovers can be refrigerated and reheated up to 3 days later.
Great recipe and nicely instructed., Any thoughts about whether to remove crust of bread or not. I ask because recently I had a panzanella bread salad that was difficult to eat because of the crusts. I imagine the heat helps break down the crust in the soup but wonder if that lovely soft consistency would be interrupted by the crust
Hi Rick,
Thank you for your comment. I leave crusts on because the bread should be uniformly dry and hard throughout before adding to the soup, but it will swell and soften nicely after soaking up the broth. Layering the bread with soup and baking it adds to the souffle-like consistency that I fell in love with from the moment I made it this way instead of cooking it on the stovetop. I hope yours comes out just as well. Buon appetito!
Hello, Deborah
I had this soup during my trip to Italy driving around in Tuscany.
Fell in LOVE with the the dish.
It was so good!
I want to do this right.
I am growing an Italian garden, just to make your Ribollita recipe.
I have the lacinato kale (Tuscan black kale/dinosaur kale) seeds.
I notice there are several varieties of Chard and Savoy in Italy
What species do you use?
Thank you
Carl
Ciao Carl, thanks for your comment. I love that you are growing an Italian garden to make Ribollita. That’s fantastic! Sadly, I don’t have a vegetable garden anymore so I buy produce from my farmer’s market and get different types of chard and cabbage depending on availability. Ribollita is forgiving (aside from the black kale, beans, and bread) so use or grow what inspires you. Let me know the results please : )